Up until 2015 or so, there were very few plastics and resins for their respective types of 3D printers. Since then, there has been much work done to develop new an interesting resins and plastics for specialized uses, e.g., plastic filament with metal filings, carbon fiber, or even wood chips and resins that are electrically conductive.
Lately, we have been exploring the use of flexible resins and plastic filament. Both the printer manufacturers and 3rd party consumables manufacturers have been developing resins and filaments that remain somewhat flexible after printing. Think of a flexible yet sturdy phone case that is rubbery enough to slip onto a phone but strong enough to withstand repeated wear and tear and drops.
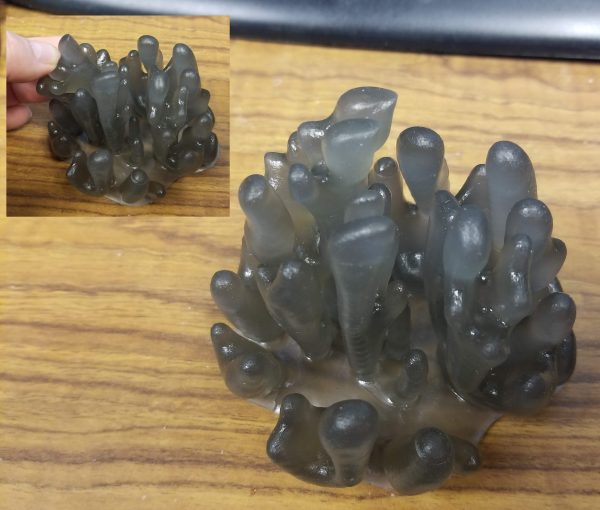
For the Form2, Formlabs has a black flexible resin. Some of the downsides are that the design needs to be printed with thick support attachment points due to the flexible material that may not hold the part as rigid as needed for alignment between layers while printing. Further, the item cannot be very thin for the same reason. For example, printing a phone case fairly vertically will cause small variations in the orientation of the part when it prints the next layer, and this can cause a waviness between layers (pictures to come). I’ve also tried using 3rd party resin because they are available in a few colors or even translucent. The first print resulted in an awesome piece (see below) – a dendritic mathematical growth that is quite coral-like. However, the resin from ApplyLabWork failed miserably as it caused the resin to adhere better to the silicone base layer (PDMS) than the build platform and caused irreparable damage to the resin tank.
For the Ultimaker 3 printer, I have been testing NinjaFlex filament. It is a flexible filament that is not ordinarily compatible with bowden printers like the Ultimaker, but one can buy super-slick bowden tubes to reduce the friction between the filament and the tube as the extrusion motor forces the filament through the tube and into the printhead where it melts and eventually extruded. The first several print jobs failed; however, I found that I can adjust the extruder motor to maximize the tension on the filament and then the filament extrudes more evenly. In the first test, I only tested its ability to be extruded and adhere to a print already in progress. Fortuitously, I needed a golden filament to print an award label for a chili cookoff tag so I used the gold flexible filament to print the lettering. The print came out surprisingly well considering I could not get the filament to extrude at all until I increased the extruder motor tension on the filament to its maximum. Next, I tried a skeleton from Thingiverse. I used 50% infill but am wondering if 100% would do better. Here is the outcome:

