Why Use It
Instructors may use the Course Merge Tool when they want to merge enrollments of two sections of the same course (same department and catalog number) or merging different types of courses (two different departments and catalog numbers).
Some instructors would rather manage class enrollments and content in a single Blackboard course rather than separate courses.
The Course Merge Tool copies the student enrollments from one or more “Child” Courses into a “Parent” Course.
After merging the courses, students will see the content from the Parent Course. Students will see the course name as the course they actually enrolled in. All student enrollments from the Child Courses will be added to the Parent Course.
What it Doesn’t Do
The Course Merge Tool does not copy any content from the Child Courses to the Parent Course.
Note: If you want to copy content from any of the Child Courses to the Parent Course you should do this prior to using the Course Merge Tool. After merging all content should be added to the Parent Course only.
Important!
In order to merge courses, the instructor must be enrolled in the Child and Parent Blackboard courses as “Instructor”.
The Child and Parent Blackboard courses must be listed in the same term in the Schedule of Classes.
The Child Courses will be made unavailable and instructors must not make the Child Courses available in the future.
Unmerging
If you need to unmerge your Blackboard courses you will need to contact Blackboard Support by calling 804-287-6860 or email blackboard@richmond.edu. A Blackboard Support staff person will contact you to coordinate unmerging your Blackboard courses.
How To Merge Blackboard Courses
To merge two or more Blackboard courses follow these steps:
First determine the Parent Course. This is the course where all your content must currently reside.
Open the Parent Course in Blackboard.
In the Control Panel, click on the down arrowhead next to Course Tools (lower left); you will see a list of tools an instructor may use (these tools are not visible to students)
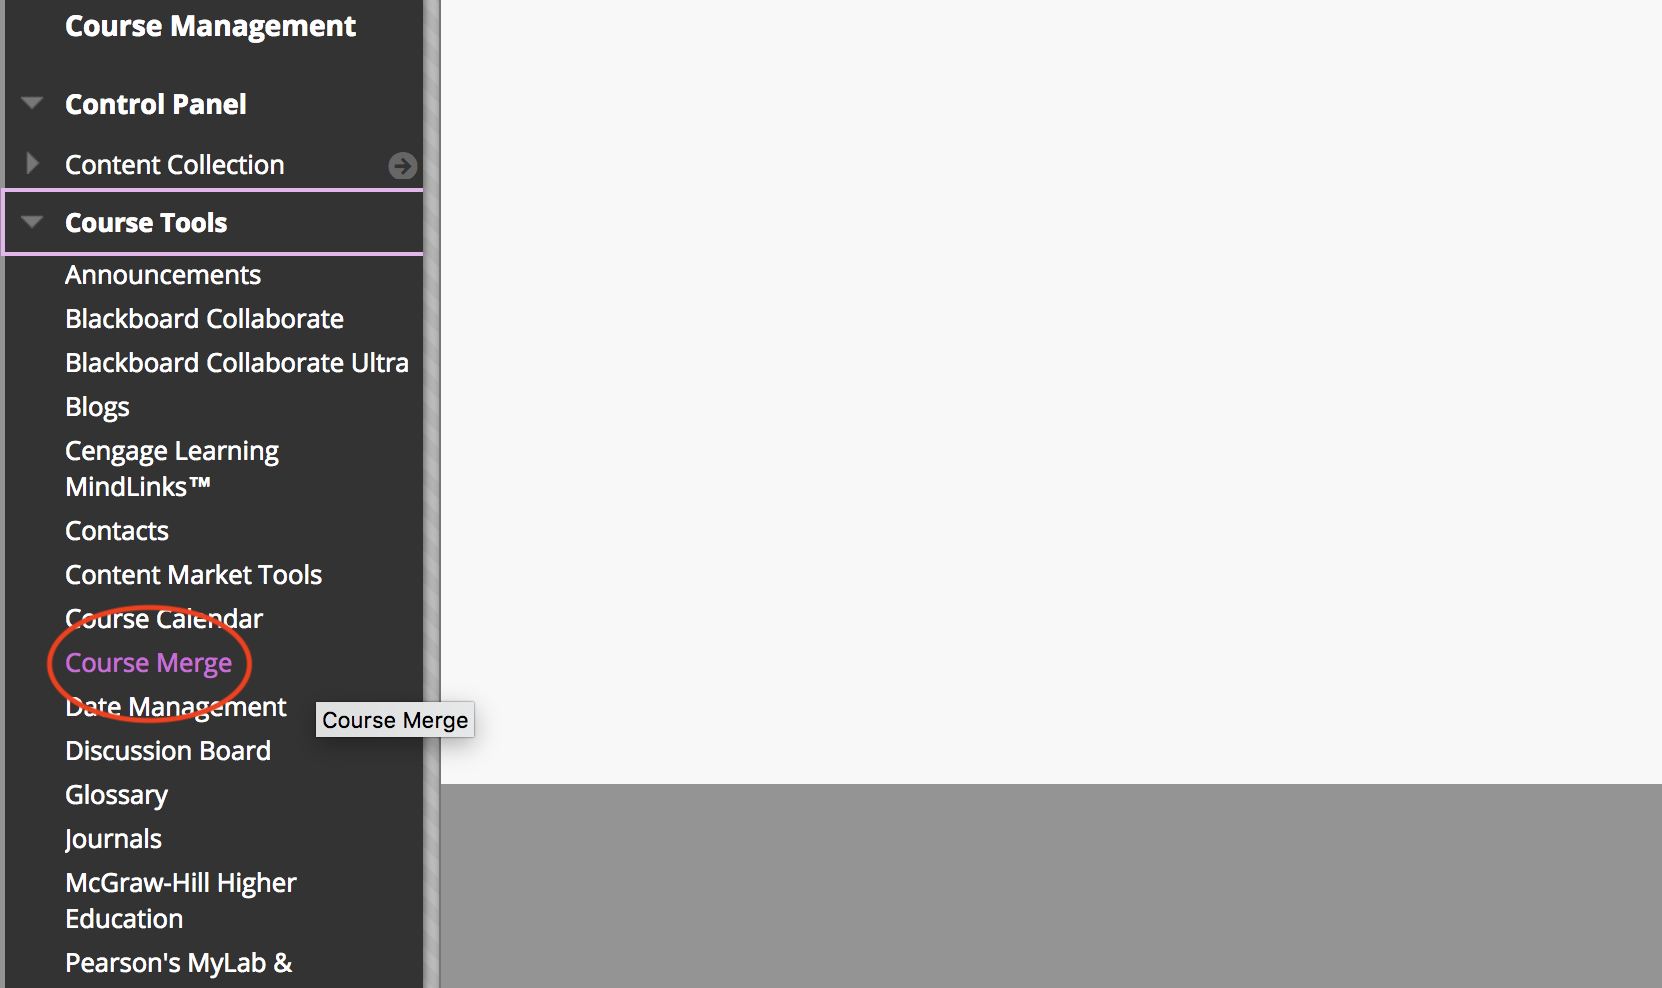
Click on the Course Merge tool and the Course Merge application will start.
The first screen will show you the Parent Course (the course you are currently logged into).
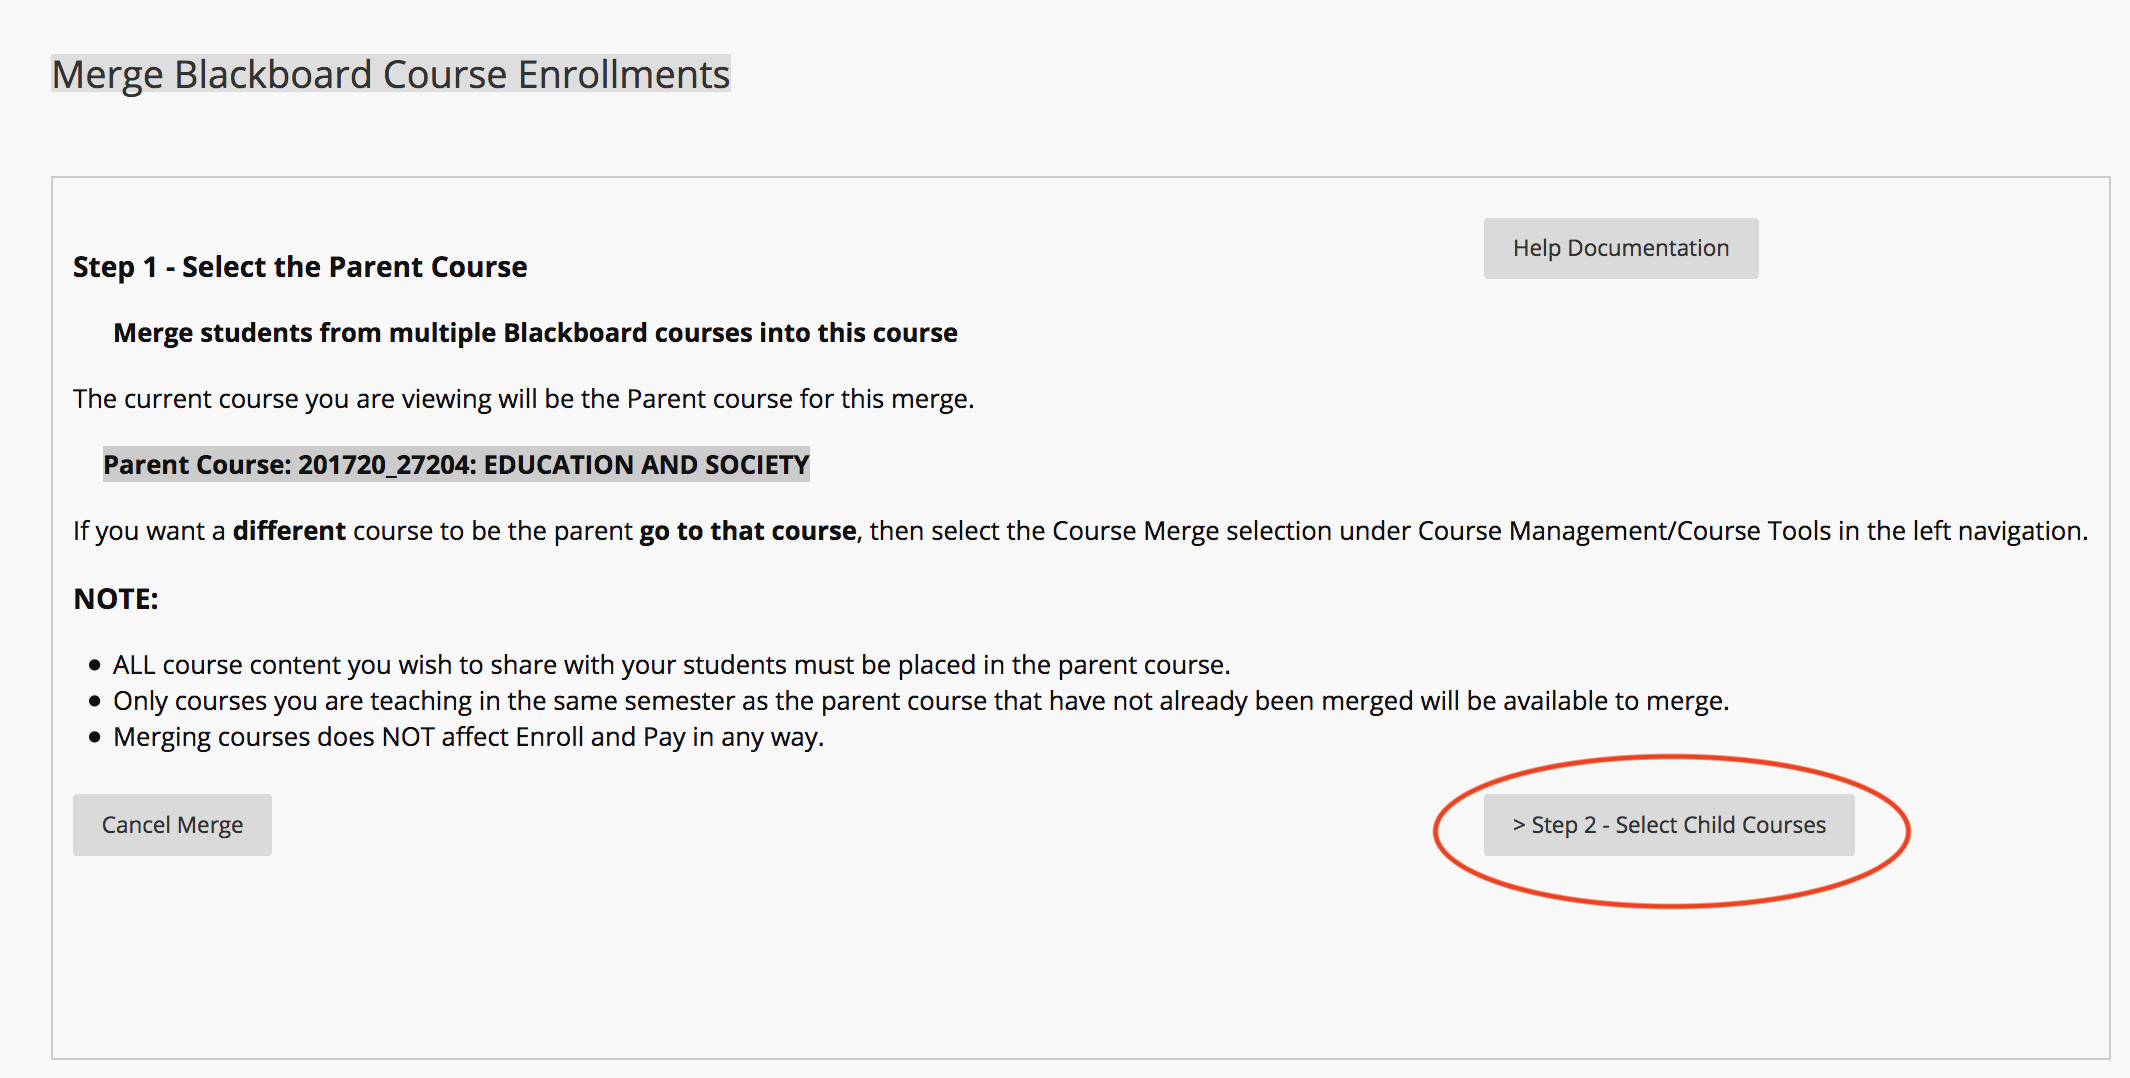
Click on the link to select the Child Courses you want to merge into the Parent Course.
On the Select Child Courses page, check the box for one or more Child Courses.
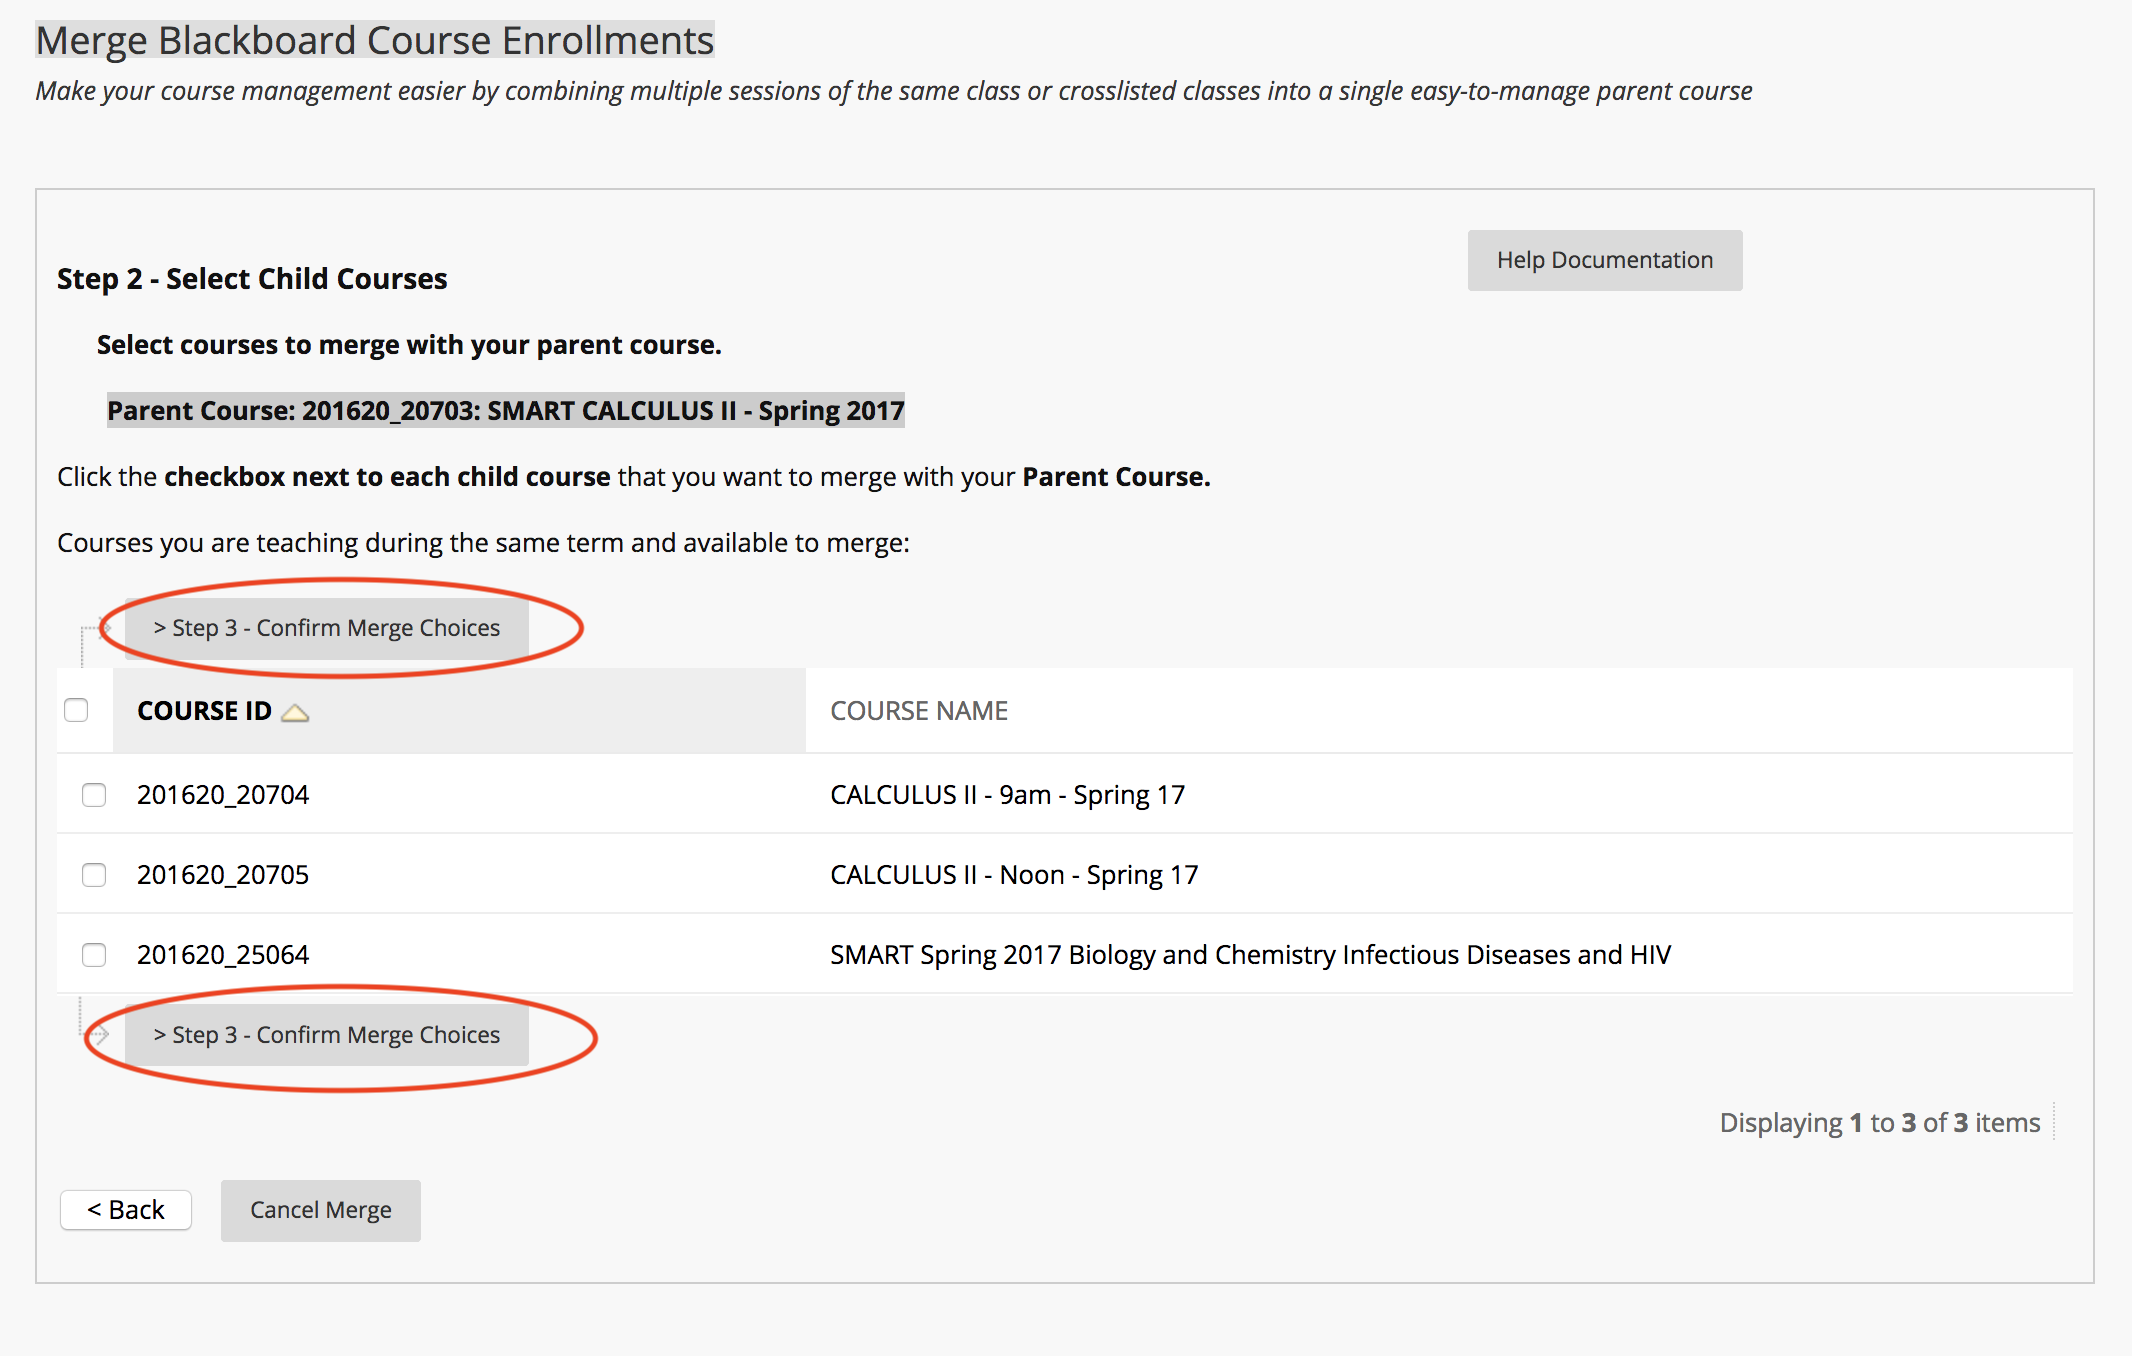
You should only see courses of the same term where you are enrolled as “Instructor”. The Parent Course should not be in the list of Child Courses you can select.
Click on the Confirm Merge Choices button.
On the confirmation page, read over carefully which course will be the Parent and which course(s) will be the Child(ren).
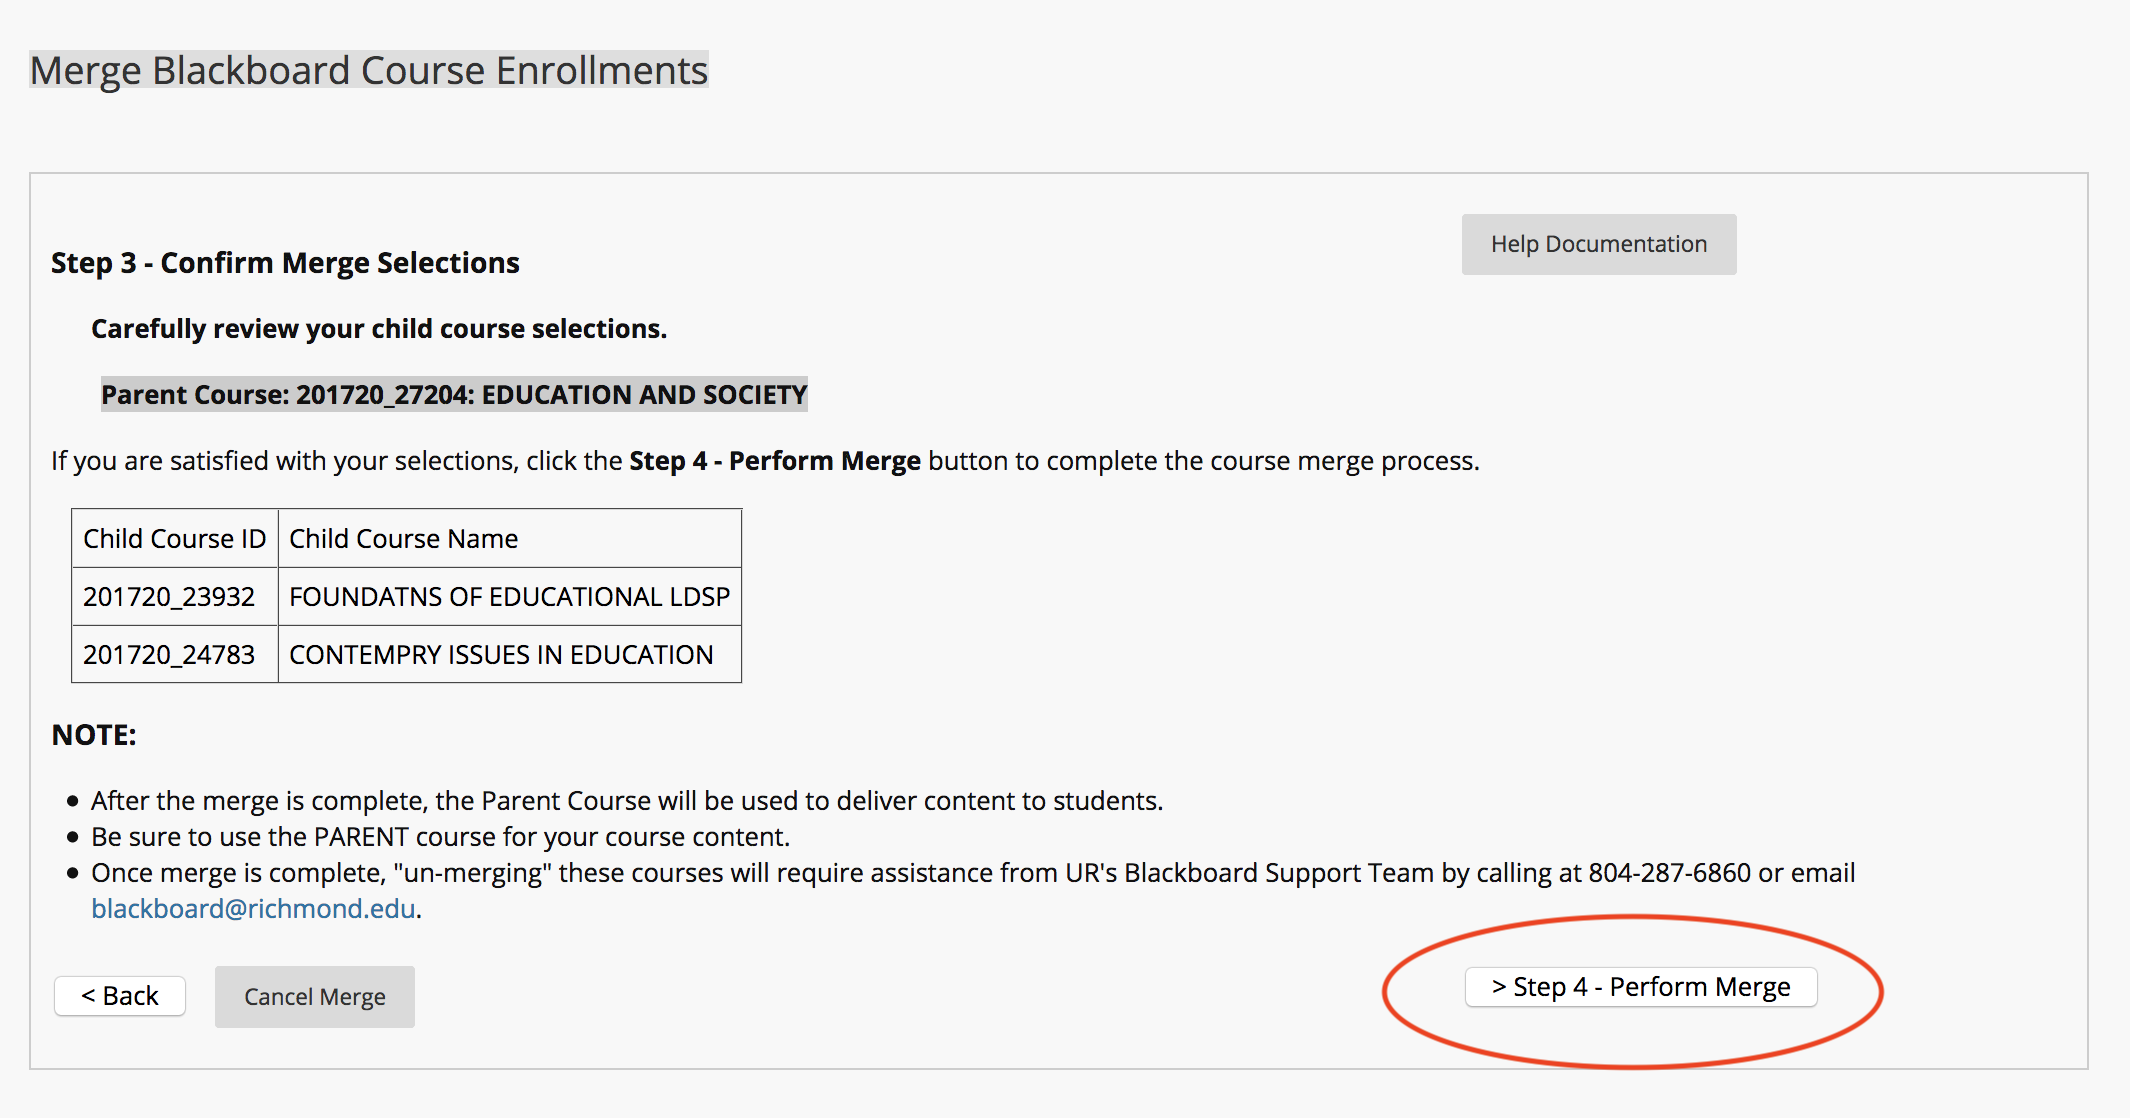
Click on the Perform Merge Courses button.
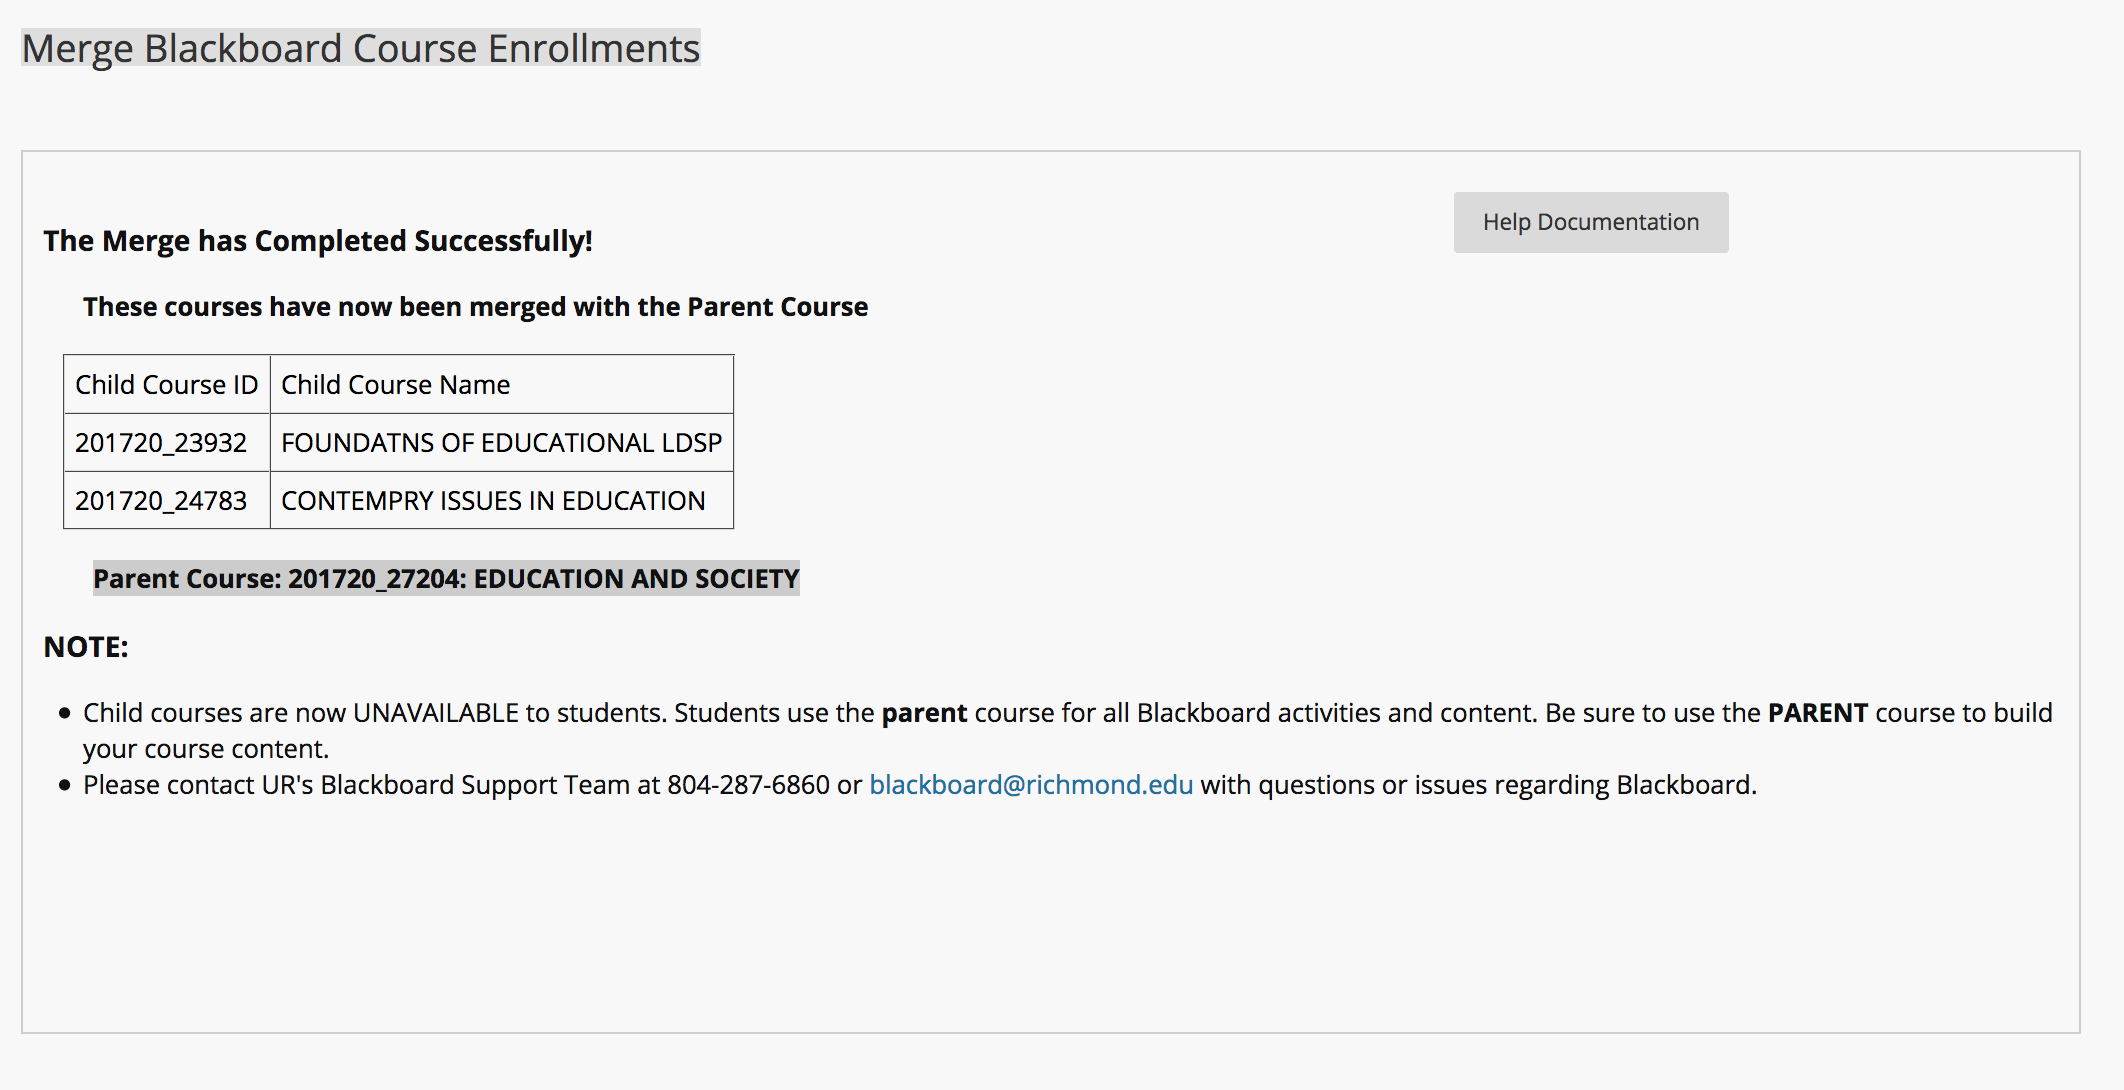
You should next see the Course Merge success page.
Need Help?
If you encounter any problems with using the Course Merge tool please contact UR’s Blackboard support team at 804-287-6860 or email Blackboard@richmond.edu. More help information can be read by clicking on the Help Documentation button at the top of this page.